Machine vision using custom TensorFlow models with Prescient Designer
In our previous blog article, we showed you how to implement a Node-RED and TensorFlow object detection application using publicly available Node-RED nodes and a typical image classification model.

In this article, we will design and develop a machine vision solution using a custom TensorFlow model for detecting the state of the ball valves running on the edge device.

Here's an image of a ball valve, often used in industrial settings.
We'll also examine how Prescient Designer enables you to deploy this remote monitoring machine vision application to thousands of devices with a single click of a button.
Import your flow into Prescient Designer
Prescient Designer is pre-configured with TensorFlow dependencies and nodes required for this tutorial. You'll need a template for this tutorial, "valve-classification-mv.json", which you can import from Template Browser.
You should see the flow in Prescient Designer after you import our template.
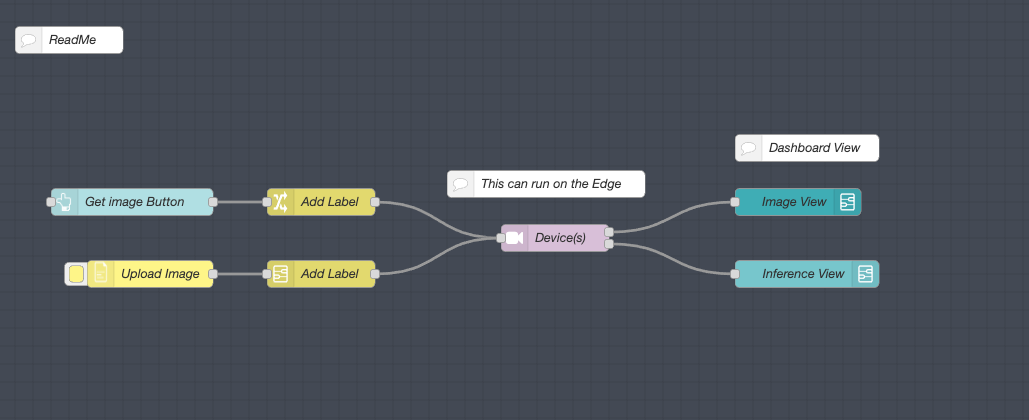
To test the valve classification inference on the cloud you can use the upload Image node to upload a valve image from the browser and see the inference result on the dashboard.

If you haven't provisioned an edge device yet, you'll need to provision one in order to run inference at the edge.
Learn how to set up your edge device to Prescient Designer through our Docs or video tutorial.
Transfer your model to the edge
The first step to making inference on edge is to transfer the model to the edge. To transfer the model, we'll import another template from Palette Manager called "transfer-files-to-edge.json".

This flow allows you to browse model files on Prescient Designer and directly send them to the edge device. That way, they can be used to run inference at the edge. You can see a video demonstration here.
The transferred files need to be saved under
/home/prescient/pd-static/"folder_name/"
to be accessed by the editor HTTP request.
In this example, we are saving the model files to
/home/prescient/pd-static/model/.
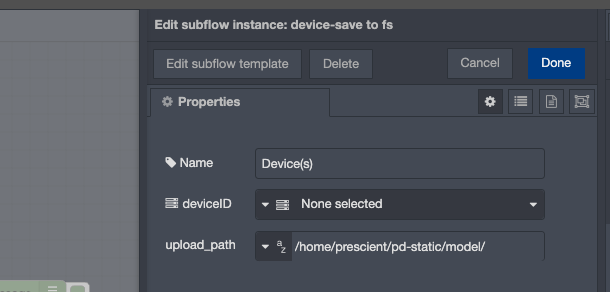
To update the folder name, update upload_path in the subflow as shown.
Running inference on your edge device
Image classification categories
The model we're using in this tutorial classifies ball valve images into three categories:

Converting imported subflow to a device
Next, we'll convert the imported custom-model-mv subflow to a device. The block of code inside the subflow will run on the edge device provisioned in the previous step.

Note: Model Initialization on Deployment
The subflow has a trigger to set the TensorFlow model in a global variable. The model will only get initialized once on the deployment, instead of being initialized on every inference.

The model's path is the upload path you used in the previous step to save the model. In this case: https://127.0.0.1:1881/model/model.json
The Inference block inside the device sub-flow uses the tf-function node to run inference on the injected camera image. It takes the images and converts them as tensors to run predictions on them.
Converting prediction numbers to labels.

This particular model gives out three classes:
0=close
1=open
2=unknown
We can convert the class numbers to labels and add prediction percentages to the output message.
Deploy and you're done!
The last step is to Deploy and go to the Dashboard from the navbar to see your results!

See your results: Through the Dashboard located top right on the Prescient Designer navbar.

Test out your machine vision application and see the certainty percentage on the dashboard.
You're all done! In our next blog article, we'll cover how you can create your own custom TensorFlow.js Node-RED node.
If you're looking to use machine vision in your professional projects, you watch our recent webinar, "Build and Deploy Node-RED Machine Vision from Cloud to Edge." Access it now.